AUDJPY Technical Analysis

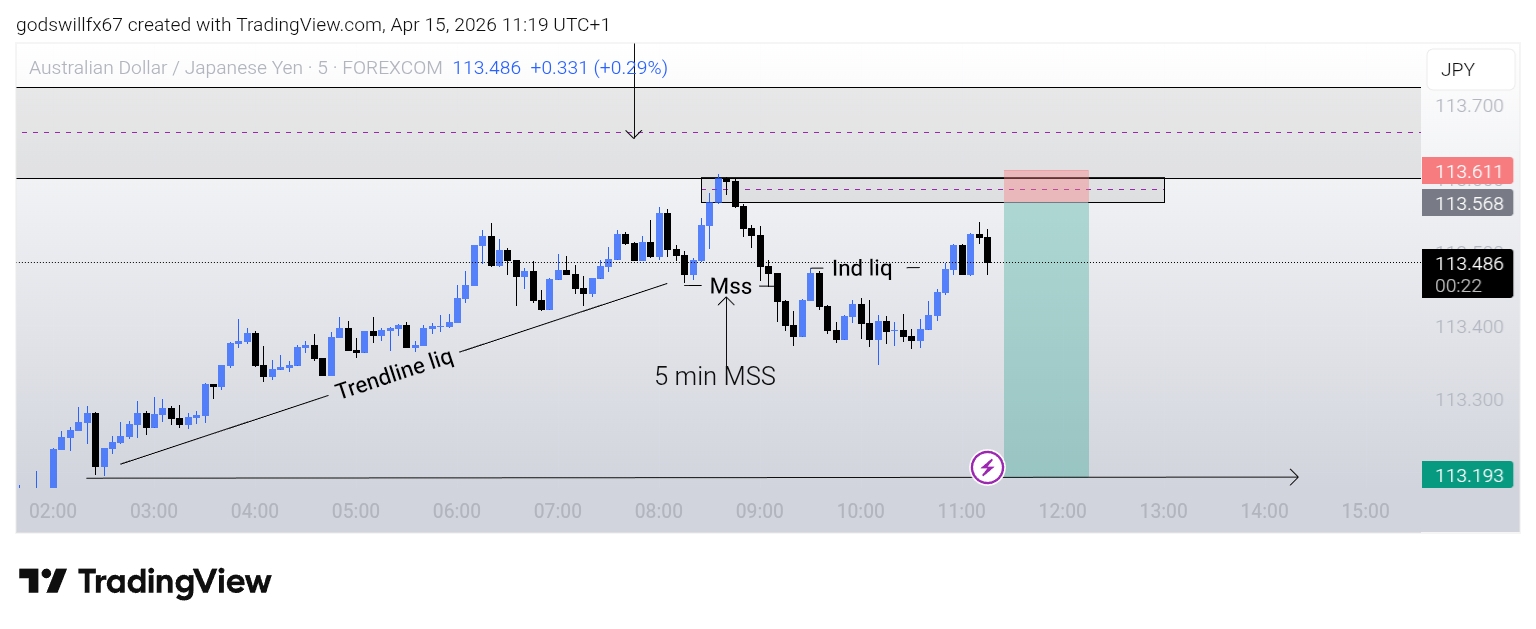
I saw this sweet AUDJPY analysis on the 45 minute.

Name of strategy: SLP ( STRUCTURE, LIQUIDITY, POI )

Quick steps:

A 45 minutes ORDER BLOCK reaction caused a 5 minutes MSS

We had our Inducement liquidity present for our POI protection

And we had our 5 minutes ORDER BLOCK fresh and clean without any mitigation.

My exit came from me seeing the trendline liquidity well presented.

My R:R is 1:8

This means for every $1 risked on this trade, you tend to make $8.

But if the trade doesn't go in our direction, you will lose the $1.

So risk management applied.

Will keep you updated on the trade.

G
@godswillfx - 1 month ago

Let's all give our insight on this analysis

G
@godswillfx - 1 month ago

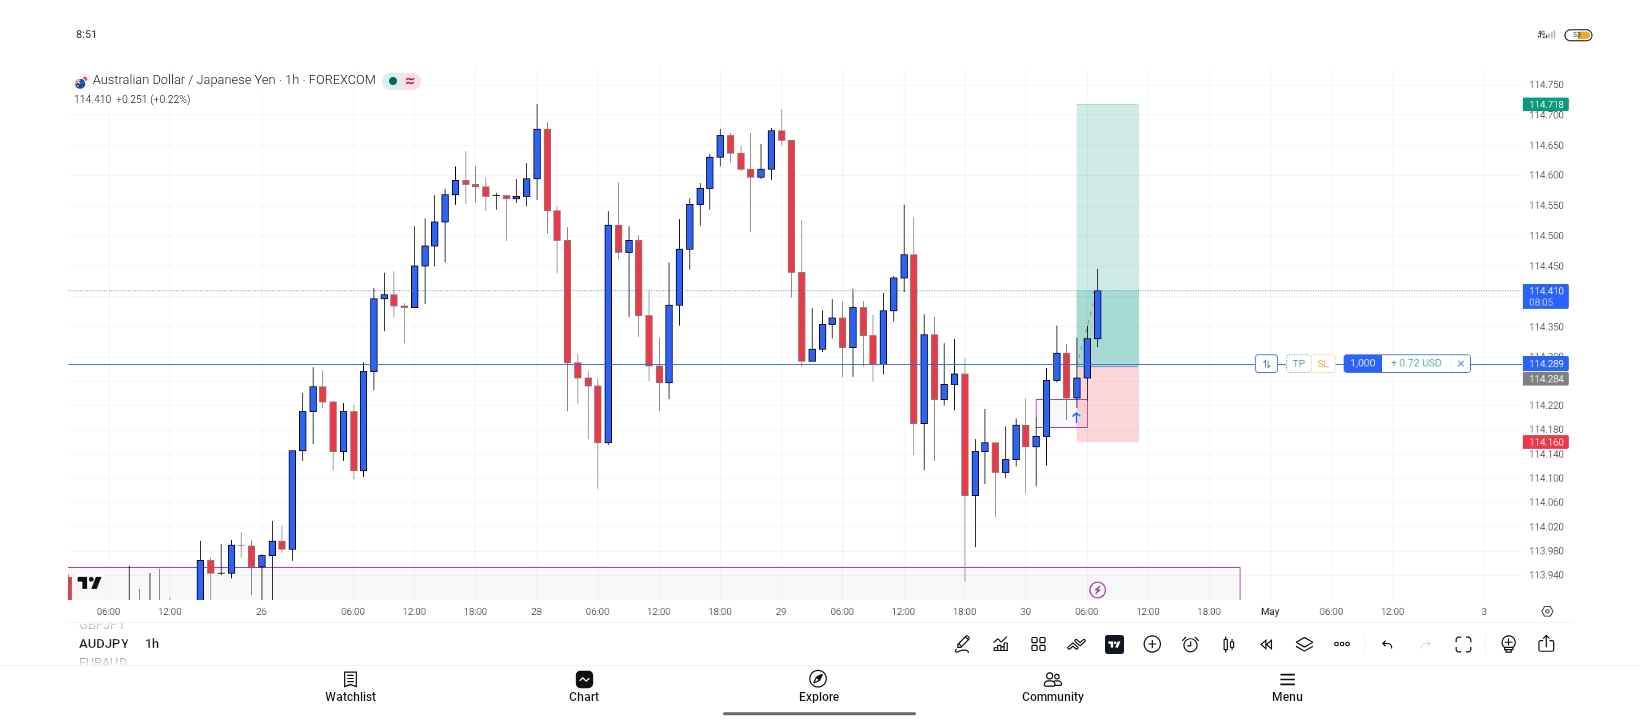
I saw this trade and I Took advantage off it

Quoted - godswillfx

I saw this trade and I Took advantage off it

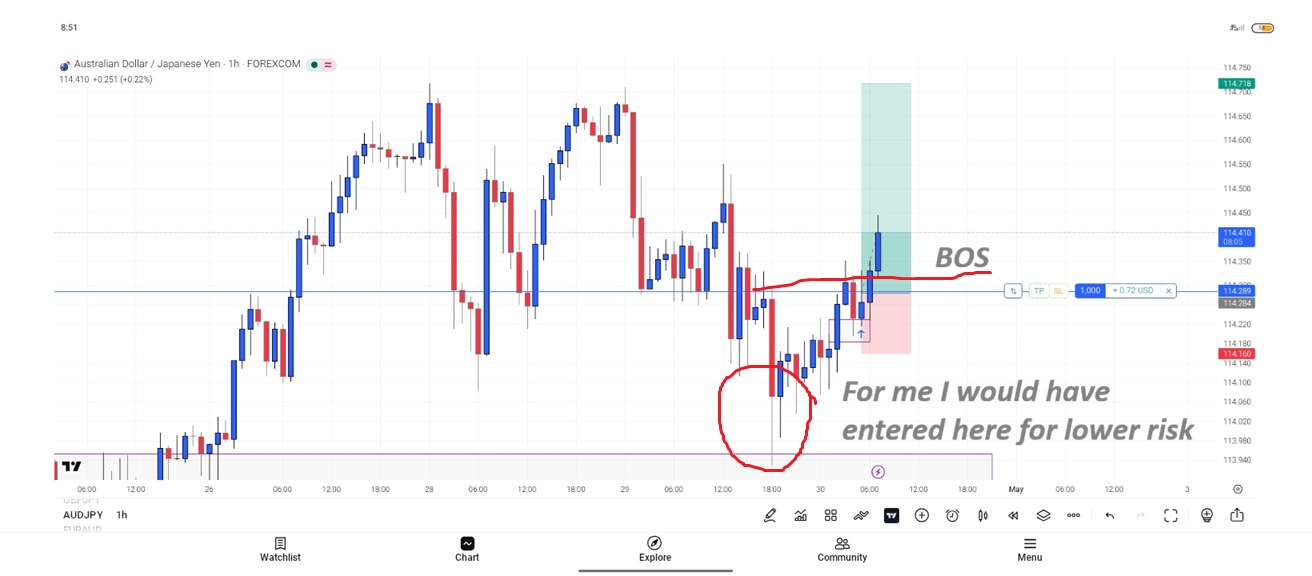
I see you bought after there was a break of structure which is good but for me I would have looked for an entry with lower risk

G
@godswillfx - 1 week ago

AUD/JPY Bearish Trade Breakdown

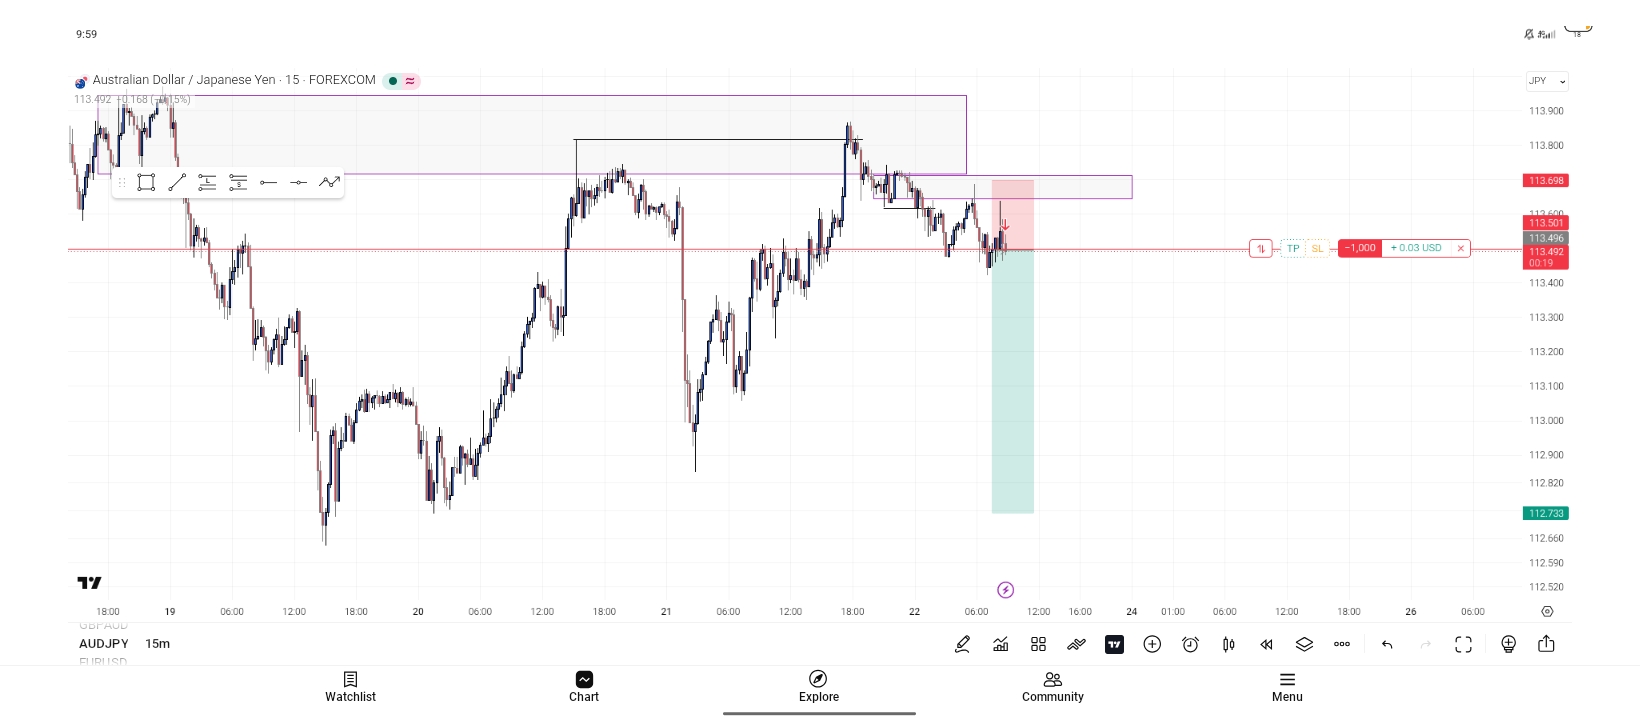
I went bearish on AUD/JPY on the 4-hour timeframe because the market broke the recent 4H low and retraced back to the 4H order block, a perfect zone for a potential sell.

G
@godswillfx - 1 week ago
Quoted - godswillfx

AUD/JPY Bearish Trade Breakdown

I went bearish on AUD/JPY on the 4-hour timeframe because the market broke the recent 4H low and retraced back to the 4H order block, a perfect zone for a potential sell.

How I built the bias (from higher timeframe):

Weekly Timeframe:

- Price broke the recent weekly structure and was pushing higher.

- I expected a retracement to the weekly order block for a buy.

- Instead, price tried to reach that weekly order block, reversed sharply, and swept the weekly high with only a wick (no candle close above). This liquidity sweep without follow-through told me the buyers were weak , strong signal that selling pressure was coming.

G
@godswillfx - 1 week ago
Quoted - godswillfx

AUD/JPY Bearish Trade Breakdown

I went bearish on AUD/JPY on the 4-hour timeframe because the market broke the recent 4H low and retraced back to the 4H order block, a perfect zone for a potential sell.

4-Hour Timeframe (where I took the bias):

- Clear bearish structure: series of lower highs and lower lows.

- Price broke the recent 4H low, then retraced to the 4H order block.

- This gave me a high-probability sell setup in the direction of the bearish trend.

G
@godswillfx - 1 week ago
Quoted - godswillfx

AUD/JPY Bearish Trade Breakdown

I went bearish on AUD/JPY on the 4-hour timeframe because the market broke the recent 4H low and retraced back to the 4H order block, a perfect zone for a potential sell.

4-Hour Timeframe (where I took the bias):

- Clear bearish structure: series of lower highs and lower lows.

- Price broke the recent 4H low, then retraced to the 4H order block.

- This gave me a high-probability sell setup in the direction of the bearish trend.

G
@godswillfx - 1 week ago
Quoted - godswillfx

AUD/JPY Bearish Trade Breakdown

I went bearish on AUD/JPY on the 4-hour timeframe because the market broke the recent 4H low and retraced back to the 4H order block, a perfect zone for a potential sell.

Lower Timeframes (Entry Confirmation):

- On the 1-hour: Saw a sweep of liquidity (price took out stops above before reversing).

- On the 15-minute: Failure to create a new swing high (price couldn’t push higher).

This combination, higher timeframe context + bearish structure + order block retracement + lower timeframe confirmation, gave me clean confirmation to enter the sell.